[starting]
Author(s) FaVdB
CC-BY-SA
realized with oStorybook 6.02a
Discovring oStorybook
Table of content
1. First start
Look & Feel
2. Preferencies
2.1. Common
2.2. Update
2.3. Appearence
2.4. Exports
2.5. Backups
2.6. Layout
2.7. Look & Feel
3. Other parameters
4. Conclusion
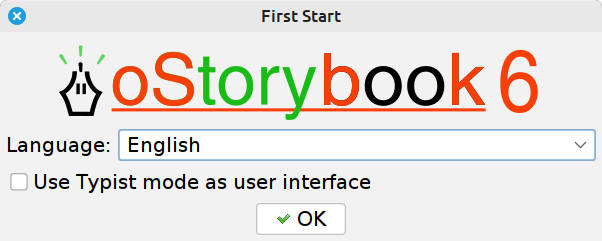
When oStorybook starts up for the first time, it needs to determine and complete its configuration according to your needs. As the software is designed to be used in different languages, the first thing you'll be asked to do is select the language you use. By default, you'll be offered the language of your operating system. If you're happy with this choice, there's no need to change it.
[starting]
The second parameter to set is the default working interface. There are two major interfaces:
- “Architect” mode, which is the original oStorybook interface.
- “Typist” mode, which is a very streamlined interface allowing you to focus on your text.
For the first start-up, and your discovery, choose Architect mode without checking the box. You'll start by discovering the software's potential, and it's in this mode that you'll find it easiest to discover the features and complete your configuration.
As I always say, the best way to discover the different functions of a new software is to start by exploring, and understanding, the different settings you can customize. You'll find them in the Edit > Preferences menu.

[look and feel]
The second settings screen concerns the general appearance of the software. You can determine :
Look & Feel : is the general appearance of the elements that make up what is presented to you on the screen, for example the shape of the buttons, and the basic graphic theme, such as the dark mode.
More colored : you can choose to add a little more color to your interface to make it more pleasing. Personally, I like a little more color from the oStorybook base theme (a medium-soft green). Some will prefer something more “rock'n roll” and opt for fluorescent orange, for example. Others, more “contemplative”, will opt for a Pacific blue. Who's to say?
Characters fonts : with + and - to increase or decrease font size, which you can also change individually.
Icon size : which means changing the size of the buttons.
Depending on your screen resolution, you may need to change some of these settings. Please note, however, that you will need to restart the software to take full account of these changes.
Like all good software, oStorybook lets you choose your preferences for overall operation, presentation interface and much more.
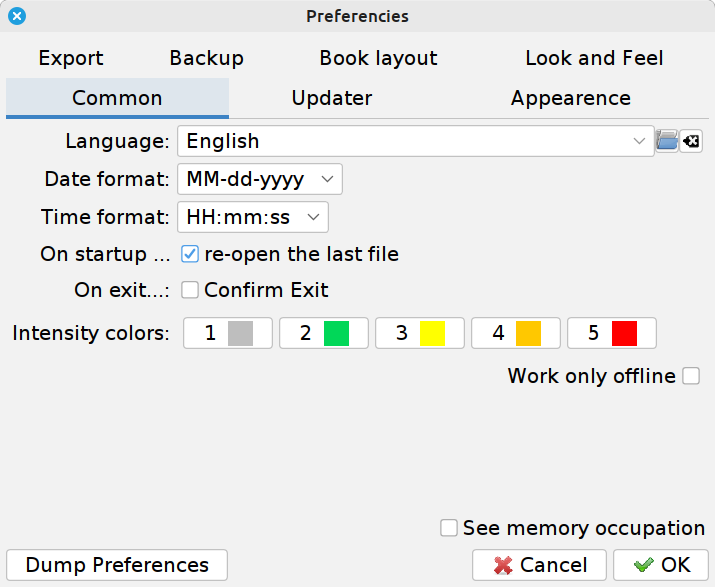
[basic preferencies]
This screen may seem complex, simply because there are so many possibilities. The various parameters are logically grouped by major category in tabs:
Common : for all basics elements.
Update : to manage the periodicity of checking the existence of a new version of oStorybook.
Appearence : to choose fonts and colors
Exports : to define the default settings to be used for exports
Backups : to determine the frequency of automatic backups
Layout : to decide how to format your text
Look & Feel : to select the general appearance, e.g. “dark” or “light” theme
Here's what the different parameters do:
As the screenshot shows, I usually work with the “open last project” and “without confirmation of exit” options. It's up to you to adjust the settings to suit your own needs.
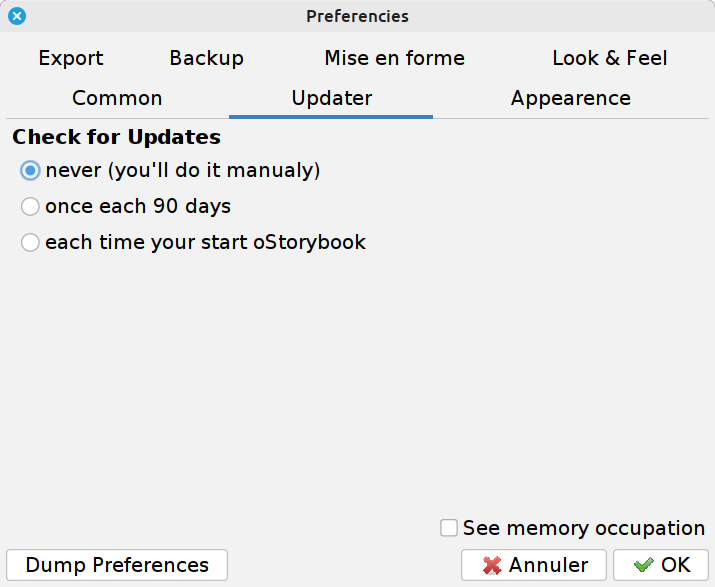
[updates]
oStorybook will be able to inform you when a new version is officially released. However, you are the only one who can decide when this update should be made.
The idea here is to determine how often to check that a new version is available.
Personally, I check the “never” option, as I'm the software developer, so I know very well when there's a new version 8-)
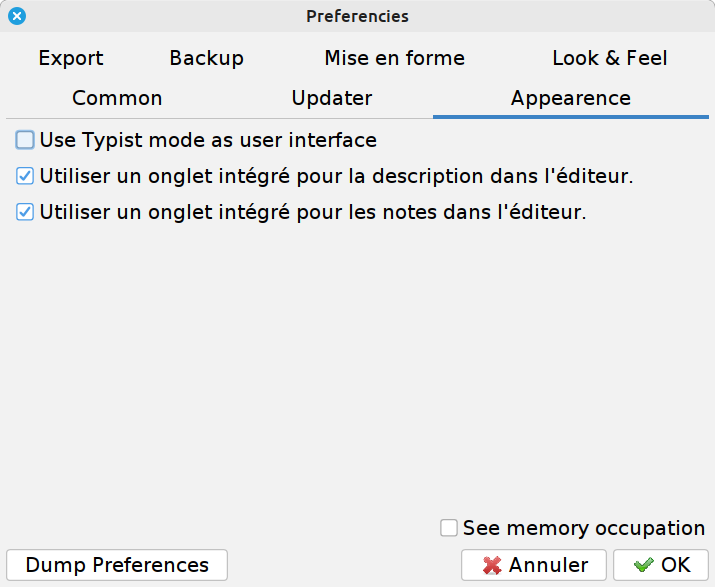
[appearence]
This is where you'll find the option of working in “Typist” mode or not.
The other settings help you make the best use of the physical space of your screen display. There's no need to go into detail here, as you'll find out as you go along. So leave everything as it is.
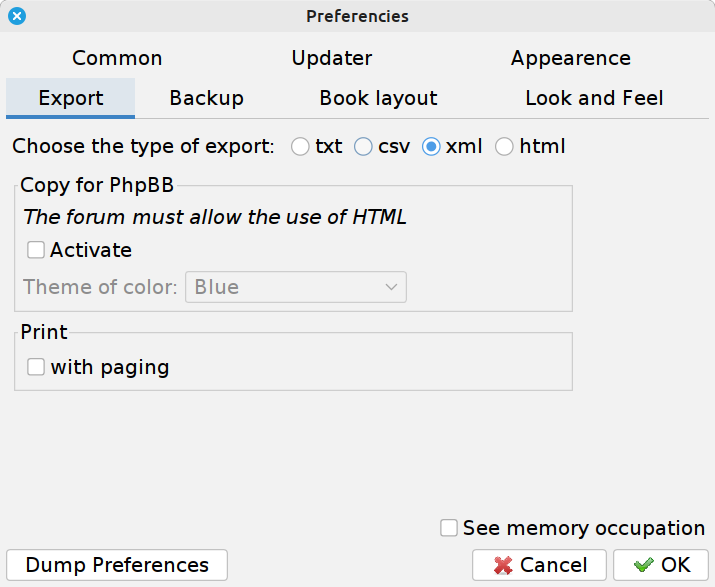
[exports]
As you'll see later, you'll be able to export your informations. The key here is to decide on the preferred format in which you'd like this information. For now, don't change anything.
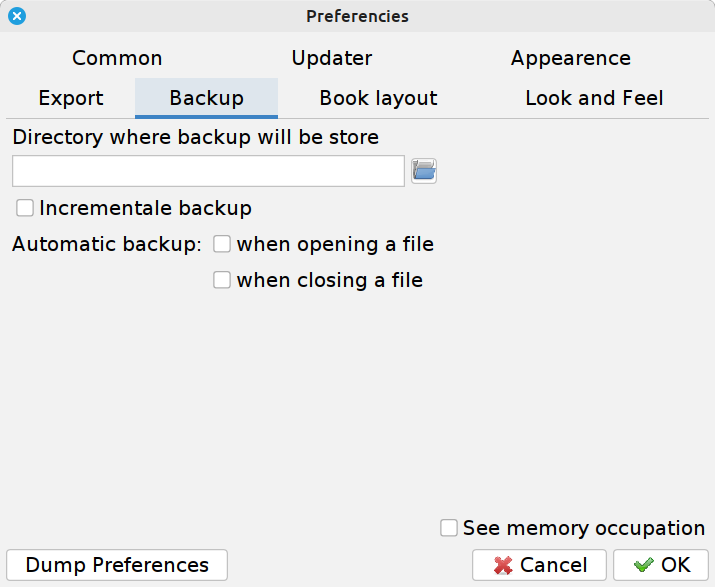
[backups]
In case of an incident, such as a power cut, it's particularly frustrating to lose the text you've just spent two hours writing. Here you can determine how often you want oStorybook to activate its automatic backup feature.
Please note, however, that although this automatic backup principle works very well, it does not have its corollary, namely restoration. Remain cautious and vigilant by regularly saving your project. Incident recovery requires the intervention of the development team. The process can be slow and complicated.
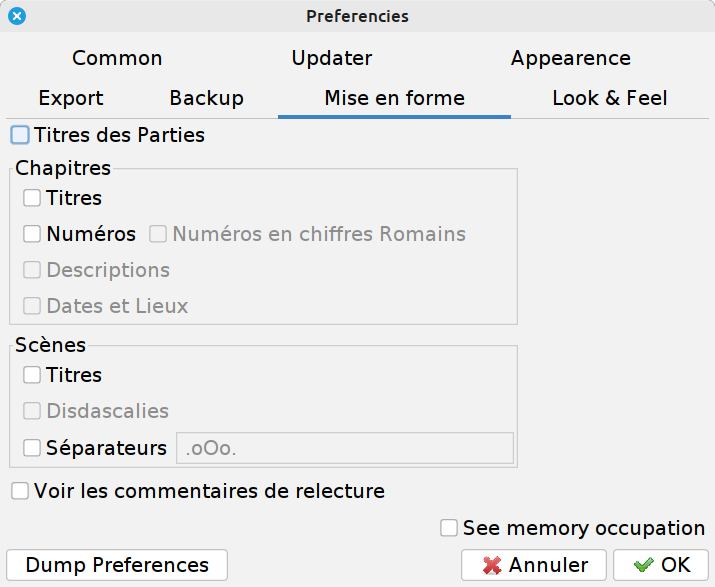
[layout]
Writing a book is fun and gratifying. But getting others to read it is even more rewarding. At this stage, you'll need to decide how your chapters will be presented. This screen allows you to set your preferences for this, bearing in mind that each project will have its own specific layout.
This is exactly what was described in chapter 1.2, including the small note about the need to reboot to take full account of the changes.
You can continue your exploration by looking at the Help > Spelling and Help > Wizard menus. Both dialog boxes are similar and concern the additional configuration required for your installation.
The spelling module lets you download and install the spelling dictionary for the language of your choice.
The Assistant module will do the same for the standard wizard settings file proposed by the team. For more information on this subject, please refer to the specific guide.
As you've seen, there are a number of parameters to adapt to your needs and desires. And therein lies oStorybook's main difficulty: choosing. Because choosing requires knowledge. Take your time and get to know the different possibilities available. Your first steps won't stop there, you'll need to discover the different elements that will enable you to develop your project and that are more specifically linked to writing. Now oStorybook is ready to work for you.
I wish you many happy discoveries.
The next guide to read would be "Create a project".